Doin’ You: DIY Face Mask
Stay safe and stay fashionable with your very own custom face masks
 Kelechi Abara
As we enter into winter with cases of COVID-19 still increasing, almost every public place has started to mandate face masks. Health officials say wearing a face mask helps stop the spread of COVID-19, however face masks have become a hot commodity and may not be available everywhere.
Due to this, you might have no choice but to put your creative-thinking cap on. Although, this may not be so bad. Masks are slowly becoming a fashion trend and who better than yourself to create a fashionable mask that shows off your individuality? Why wouldn’t you want to make your own face mask, especially when it takes up half your face!
Let your creativity shine through amidst the pandemic with this face mask DIY.
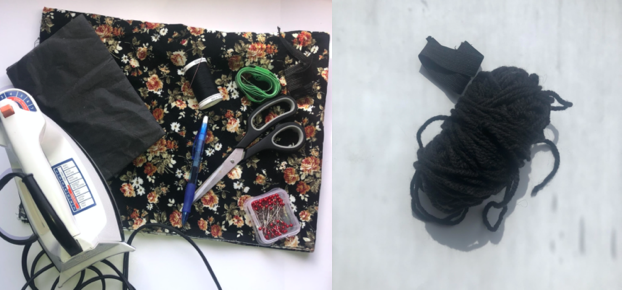
What you will need
- One thin piece of fabric or interface (make sure you get an iron non-fusible interface as fusible interfaces contains glue that is toxic to inhale)
- One thicker piece of fabric
- A needle and thread or a sewing machine
- Scissors
- A pen (optional)
- Pins
- Elastic or yarn
- Iron (optional)
- Measuring tape
Advice
- Test the fabric to make sure it is breathable by covering your nose with the material for a couple of seconds. Make sure you wash your fabric prior to placing it on your face.
- Old cotton t-shirts are a good choice if you would like to make an up-cycled mask. I used material fabric scraps from a previous sewing project.
- A sewing machine is ideal for this DIY, but it is still 100 per cent doable without one. If you choose to hand sew I would recommend stitching the area twice.
- There’s nothing worse than using a pair of dull scissors to cut fabric. To keep your mask looking professional, be sure that you are using a sharp pair of scissors that can do the job properly.
- If you have elastic handy that is great! Otherwise, yarn can do the job just as well. Yarn also gives you the ability to adjust the ear loops based on your facial measurements.
Making your mask
- Cut both thin and thick fabrics into a 22.5 centimetre x 15.5 centimetre rectangle. Afterwards, place the right sides (the patterned sides) of the fabrics together.
- Cut out two lengths of yarn (20 centimetre) or elastic (17 centimetre).
- Thread your sewing machine or needle.
- Sew your two fabrics together by sewing around the perimeter of your fabric. To make this process easier, I would recommend that you pin the two fabrics together.
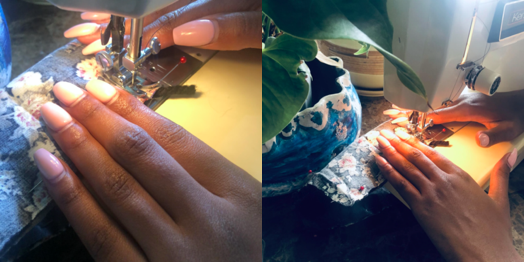
- Make sure you are also sewing in the yarn/elastic at each corner. This is the tricky part. When you get to the first corner, match the end of your thread/elastic to the corner of the fabrics, sandwich it in, and sew it in place. When you get to the next corner, find the other end of the first piece of elastic/ yarn, sandwich that in between your fabric, and sew it into the corners of your fabric. Do the same to the other side of your fabric with your second length of or yarn/elastic. Make sure to leave a five centimetre opening on the top. I recommend double stitching (using the reverse stitch if you have a sewing machine) in the corners to make sure your yarn/elastic stays in place.
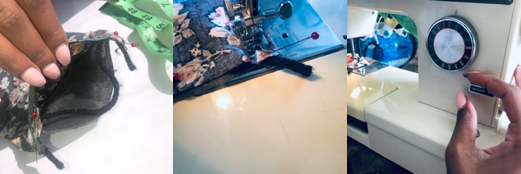
- Using the five centimetre gap you left, flip the mask so that the right side (the patterned side) of the fabric is outwards. Now you can iron the mask.
- Make three pleats at both ends of your fabric. Place pins in each pleat to keep them down.
- To keep your pleats in place, sew around the entire perimeter of the mask again. You can iron the pleats at this stage as well, if you’d like.

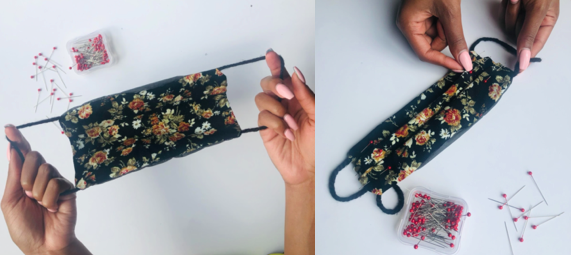
- Take out the pins and your mask is finished!
- If you find that the ear loops are too large, you can easily clip the middle, retie a knot and tighten to your liking.
Congratulations, you have made your own face mask! For correct use, make sure to wash between each use. Do you part and let’s get through this pandemic together!