
 Christina Varvis
Snow on the ground for six months of the year means that cyclists in Edmonton have some tricky conditions to adapt to. If you’re interested in cycling in the winter months, you can spend thousands outfitting yourself in top-of-the-line kit, but most of what’s required is likely already in your closet, or can easily be DIYed together. With a little time and effort, you can cycle comfortably through most of the winter on a student budget.
The Bike
As supervisor of the University of Alberta Bike Library, as well as its on-staff mechanic, Nathan Eifert is an experienced winter cyclist who has advice on everything from maintenance to what to wear. In a workshop presentation in October, Eifert stressed that cycling in winter takes a large mechanical toll on your wheels.
“It’s a good consideration to have a cheap mountain bike that your build up for the winter,” Eifert says, “things rust and wear much faster than in the summer.”
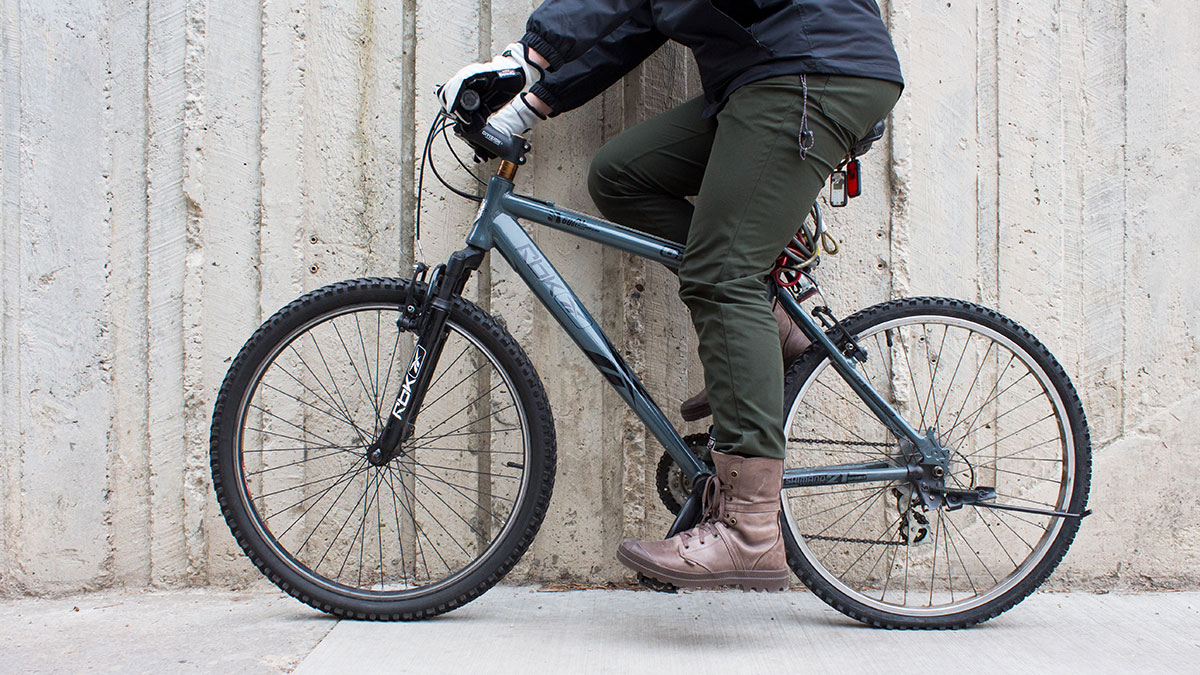
Riding in the winter starts with the bike itself. Eifert recommends a sturdy, steel-frame mountain bike, these can be had used from anywhere from free to a few hundred dollars. When intending on winterizing a bike, there are several must-have add-ons.
First of all, fenders and winter tires are a must. Fenders keep the snow, slush, and rain on the ground, not on your backside, keeping you warmer for longer. Winter tires can be store bought or made yourself fairly cheaply. When it comes to snow and ice, rubber alone doesn’t cut it, the studs in winter tires will stop you spinning your wheels and sliding out in bends.
With winter sunrises late in the morning and sunsets at 4 p.m., Eifert stresses the importance of lights and reflective clothing. Battery-operated lights on front and rear means that cars and pedestrians can see you in dark, snowy conditions. Also, wear the maximum amount of reflective clothing possible; high-visibility vests might look stupid, but they could save your life.
Where the drivetrain is concerned, it’s really a matter of what you have. Eifert recommends not using a fixed-gear setup, as these can lock their rear tires easily and lead to crashes. Whether you are more comfortable with a traditional derailleur setup, internal hubs, or single speeds is up to you. Just remember that drivetrain maintenance becomes much more intensive in the winter months.
When slowing your roll in the snow, brakes matter. Drum or disc brakes are best, as the rubber pads of rim brakes can be contaminated with salt and grit, thereby wearing out quickly. In addition, cold and wet conditions can lead to reduced braking capability on rim brakes, and the melt-freeze cycle can cause rims to ice up quickly. To prevent this, store your bike outdoors or indoors, and going through the cold-warm cycle as few times as possible.
Dressing the Part
When it comes to outfitting yourself, layers are key. People often dress too heavily and begin to sweat during their ride. Getting wet means you get cold, and in minus 30, that isn’t good. A wicking undershirt, fleece or wool sweater, and shell jacket on top are adequate, as well as a good pair of long underwear and waterproof pants on the bottom.
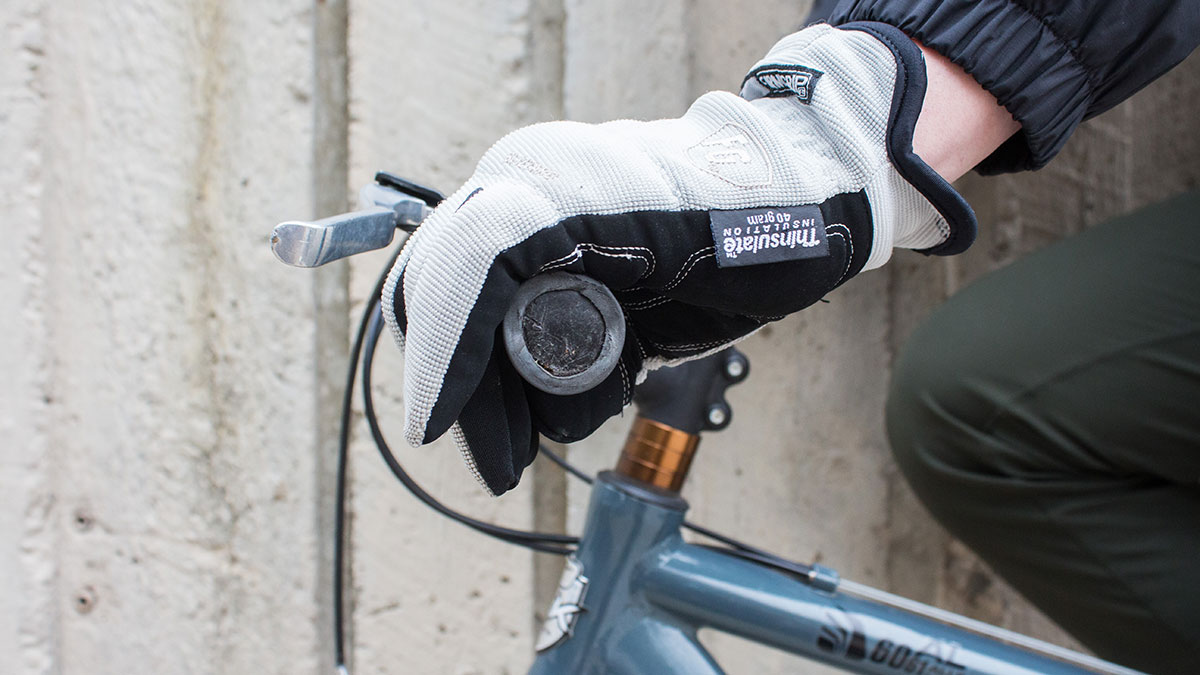
Your hands and feet tend to get cold fast, so grab multi-layer gloves and shoes that keep out the wind and water. Designated winter cycling mitts do work well down to about minus 15, and past that, traditional ski gloves are a good option. Your local bike shop has a plethora of things to keep your hands and feet cozy, so check it out and see what’s right for you.
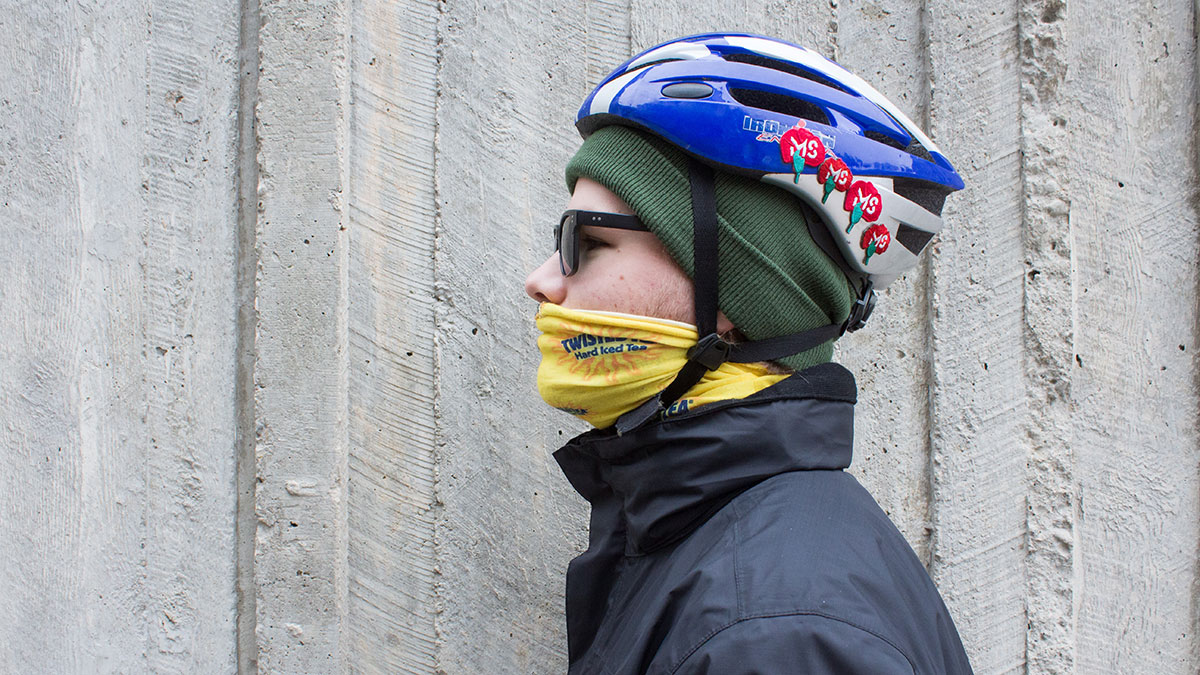
Lastly, and most importantly, your head. Almost everyone cycling in winter will crash, so a helmet is a must. Putting a light toque underneath your helmet, as well a scarf or neck tube on your face and neck will mitigate wind burn. Also, a pair of clear glasses or ski goggles are a good idea to protect your eyes from wind.
How to Ride
Riding in the snow requires an entirely different style of riding, so Eifert gave us the following tips:
- Slow Down: Do not expect to cruise down the street at the same pace you do when the mercury is above zero. When riding in the winter, you should be going slowly enough to read and negotiate around anything that might be in your path.
- Keep it Straight: Though you might be used to swerving left and right in a desperate attempt to avoid ruts in the summer months, cycling on ice and snow is about maintaining as straight a path as possible. You are most likely to have an accident in a turn or under brakes, as losing traction in these situation usually results with you on your rear end. Also, avoid leaning your body through turns, this can exacerbate balance issues
- Know your Route: In terms of where to ride, know your neighbourhood. If there’s a route that stays smooth and works for you, use it! Outside of this, look at main roads as your primary routes. They are usually the first to be ploughed and sanded and are great if you are comfortable in traffic. Sidewalks, for Eifert, are fair game in the winter for cyclists, if you are respectful of pedestrians. Conditions are less predictable on trails or side roads, so don’t expect them to be passable.
Choosing whether or not you cycle on a winter day comes down to common sense. If you know your route is treacherous, don’t ride. Also, consider combining use of your bike and transit to get where you’re going. Lastly, if everything goes downhill, sometimes you just have to walk.
Maintaining your ride
Your bike will still require maintenance, probably more so than in the summer months. Keeping pivots, levers, and chains lubricated and in good working order becomes much more of a challenge. In addition, parts are more likely to break when subjected to winter conditions. Fear not, for there are several institutions on and around campus to help you.
Edmonton Bicycle Commuters Society
Part cyclist advocate, part community organization, the EBCS has two BikeWorks workshops on the North and South side. They have a huge selection of used bikes and parts for sale, and will provide a warm, fully equipped workshop to work in.
They run Women’s, Trans, and Non-Binary Only nights three times per month, as well as cool film screenings among other things. They’re a great resource and awesome to work with, and are definitely worth a look if you plan on cycling in Edmonton.
Redbike (or your preferred local bike shop)
A five-minute walk from campus (it’s beside Sugar Bowl), Redbike carries an enormous selection of parts, bikes, and equipment to suit any budget. One of the first stores in Edmonton to embrace the fat bike trend, Mark Jung and the rest of the fine folks at Redbike will be more than happy to walk you through what’s available.
U of A Bike Library (SAB1-13, Open TR 10-1, W2-5)
Deep in the heart of the South Academic Building lies a resource few students know exists. The University of Alberta Bike Library is a Sustain SU initiative that provides bikes, parts, and assistance with repairs to students and staff at the University of Alberta.
With nearly 60 bikes that can be rented out from April to late October, the Library also has a fully stocked workshop of new and used parts with which students can repair their bikes. Eifert emphasized that the Library is an educational workshop, and that they’ll teach you how to fix your bike, not fix it for you.
If you aren’t looking to invest in parts, they have a wide variety of old and new available for sale. If you blow a tire on the way to school or you just want a warm space to work on your bike, the Library can help you out!
The Next Level: Fat Biking
Though you can get by without an expensive two-wheeled ride, there is a ton of fun to be had in the ever-growing fat bike scene in Edmonton. With a more significant upfront investment, these go-anywhere machines can have you zipping over terrain you never thought two human-powered wheels could handle. Having become more commonplace over the past few years, you can find many quality new and used models for $1,000-1,500. The fat tires combine with low gear ratios to create a machine that is relatively easy to push through snow, sand, or whatever other terrain you want to cover. In addition, their low stand over height means that you can step off the pedals into deep snow and not hurt yourself on the top tube.
Essentially, they go where no other bike does. Combine four or five-inch-wide tires, as well as running on very low air pressure, and these bikes will grip any terrain you put them on. Mark Jung, President of the Redbike cycling club and interclub fatbike ride leader says fat biking has skyrocketed in popularity in recent years.
“Initially, they were kind of a novelty item,” Jung says. “Eventually people realized that this lets you ride on every single trail in Edmonton in the winter … it’s a great continuation of the cycling season.”
Jung said that though it may have started with a handful of companies making the bikes, almost every brand in cycling now does their own version. All tastes and budgets are accounted for, with everything from $1,300 setups with basic steel frames to full-carbon, $10,000 race machines.
“It started as something that a few of us had,” Jung said, “and now it’s come to the point where you see strangers riding in the river valley. I used to know everyone with a fat bike!”
Jung points to the fat biking community as a great new addition to winter activities in the city. Cycling at a slower pace, with soft snow to land in makes winter riding more approachable for many people. For Jung, something about riding bikes in the snow gives a sense of fun you can’t get anywhere else.
“Even with some of the craziest wipeouts we’ve had, people will just get up and dust themselves off with a smile. There’s a real sense of childlike glee when you’re riding in the snow on a fat bike.”
How to Winter Tires
DIY Method 1: Zip Ties
This is an effective, if not really durable method for creating a passable set of winter tires. They’ll get you around in a pinch, but you may only have a month or two of riding until you have to redo the ties.
- Find some zip ties, the fatter and beefier the better.
- Decide what kind of interval you want to go for, and wrap the ties around your tire and rim.
- Cinch ties tight so the lock nubs are on the sides of your tires, so they contact the ground in deep snow or in turns.
DIY Method 2: Screw Tires
This is what most people think of when they hear “DIY” and “winter bike tires” in the same sentence. A well-constructed set of these can make it through a few seasons without needing replacement, and can be made for under 50 dollars per set.
- Gather your equipment, you’ll need a set of mountain bike tires, and rust-proof flat head screws that will reach through their tread knobs. Also, duct tape and/or an old inner tube.
- Decide what kind of pattern you’ll go for, from subdued to full Mad Max. Be aware that studs in the centre of the tread pattern will wear down easily. Also, ensure your chosen screw pattern will clear any brake components or frame pieces before you drill.
- Pre drill holes through the tire with a bit smaller than the width of your screws
- Screw screws through the pre-drilled holes, with points facing out.
- Using duct tape, cover the inside of the tire and heads of the screws. This will help prevent tube blowouts.
- If you are using an old tube, simply cut out the valve stem and slice around the inside of the tube, essentially making a jacket for the tube you will end up using.
- Re-mount your tires, make sure everything runs right, and get riding!
Method 3: Store-Bought
Though they won’t make your bike look like something out of a James Bond movie, these tires will do the job well. Just be prepared to pay for quality. If you want more than a season out of winter tires, be prepared to spend over 100 dollars for a set of two. For Eifert, Schwalbe tires are the go-to, though many in the cycling community have good success with Nokians.


Just a quick editorial note: the subheadings for EBCS and the bike library need to be switched.
Thanks for the heads up, I just changed it!